
How to use Advanced Mail Merge in Word to Personalize Emails in Word 2013?
Introduction
From time to time you need to send out an email to multiple people. You might want to thank customers for attending an event, or you want to send out the email to your colleagues asking them for feedback on something. Whatever the reason is, you’ll be much more successful in your communication if your email is personalized.
In this video, you’ll learn how to use mail merge in Word 2013 to add individual names to your email messages, you’ll also learn how to customize the email message based on the data in an Excel file. Let me show you!
How to review an email recipient list?
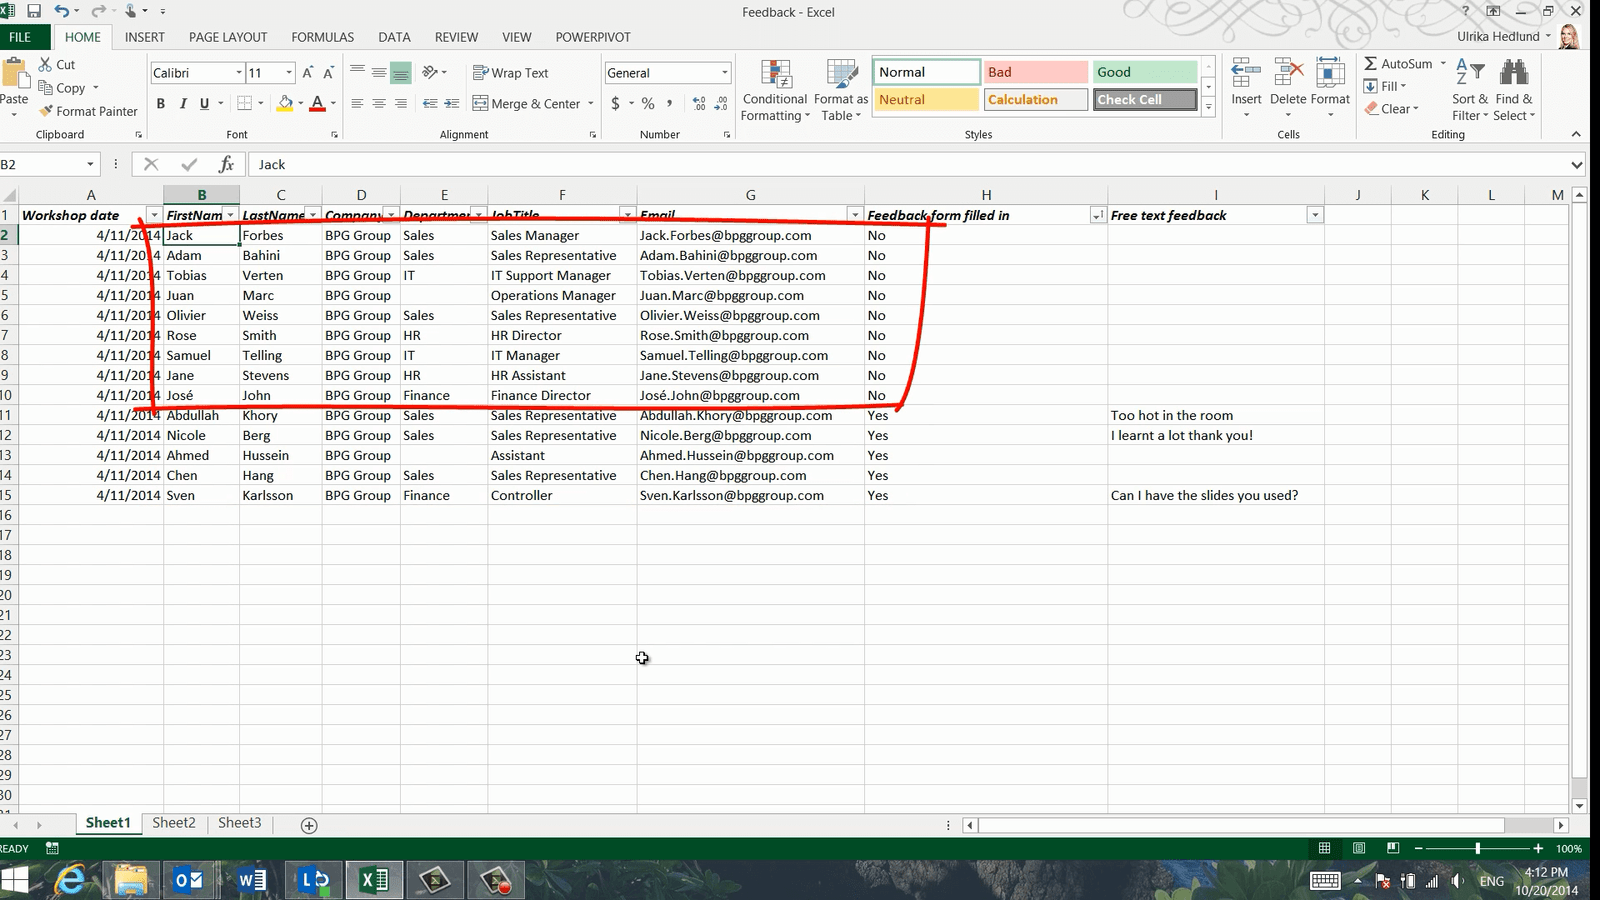
We recently had a workshop for one of our customers. After the workshop, we asked the participants to fill out a feedback form. In this Excel spreadsheet, I can see who has filled in the feedback form and who has still not given us their input.
I’d like to send out personalized email messages to all attendees thanking them for participating in the workshop.
How to Review email messages?
All email messages should address the participant by the first name. All email messages should also include a link to the content covered during the workshop. In the thank you email to those who have not filled in the feedback form, I’d like to include a reminder with a link to the form.
In the email going to those who have filled in the feedback form, I’d like to thank them for their input and address any specific feedback they might have provided us with.

How to start a start a Mail Merge in Word 2013?
Even though I’m going to use Outlook to send the email messages I’m going to use Mail Merge in Word 2013 to automate the process of personalizing the email. To start the Mail Merge click the “MAILINGS” tab and then select “Start Mail Merge” and then “E-mail Messages”.

How to select recipients in Mail Merge from an Excel spreadsheet?
Next, I’ll select my recipient list.

I’ll click “Select Recipients”, “Use an Existing List” and select the feedback spreadsheet I have open. I’ll select “Sheet 1” and since my first row of data contains column headers I’ll leave this checkbox marked and click “OK”. To see all recipients click “Edit Recipient List”. Here I can see that all 14 attendees have been selected.

How to filter recipients in a mail merge?
First I want to compose the email to those nine participants that have not responded to their feedback. In the spreadsheet, the column called “Feedback form filled in” for these participants is filled with “No”.

To select only these participants, I’ll click “Filter” and in the “Field” drop-down I’ll select the field “Feedback form filled in” and write “Equal to” “No” in the “Compare to” field. Then I’ll click “OK”.

Now you can see that only the participants that have not provided their feedback have been selected for the Mail Merge. I’ll click “OK” and now I can compose the personalized email messages to these nine participants.
How to add a greeting line in a mail merge?
First I want to greet each participant by their first name. I’ll click “Greeting Line” and then leave the default which is “Dear” and then select the first name “Joshua”, which is just a sample first name.
Here I get a preview of my own recipients.
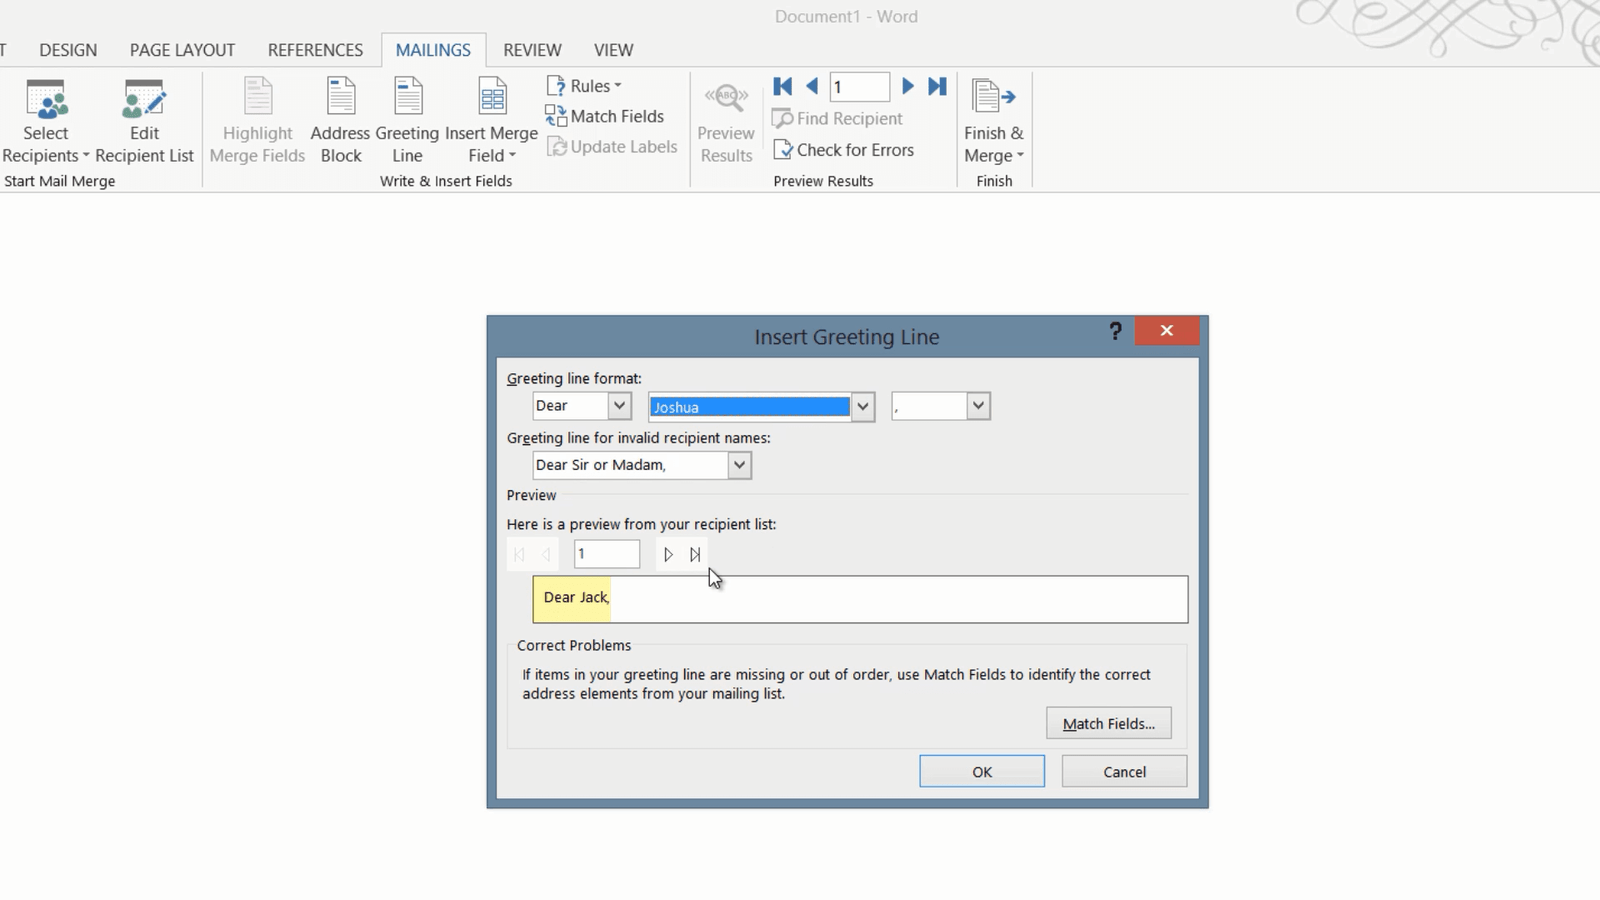
I’ll click “OK” and the greeting line is inserted into my email message. Now I’ll copy some of the text that I’ve already written in my draft email message. I’ll mark the text, including my email signature, right-click and “Copy,” and then I’ll go back to Word, right-click and “Paste” “Keep Source Formatting”. I want the whole email to have the same formatting so I’ll just mark some of the text from my email, click the Formatting Paint Brush and then paint the greeting line so that it has the same formatting as the rest of the email.
Previewing individual email messages
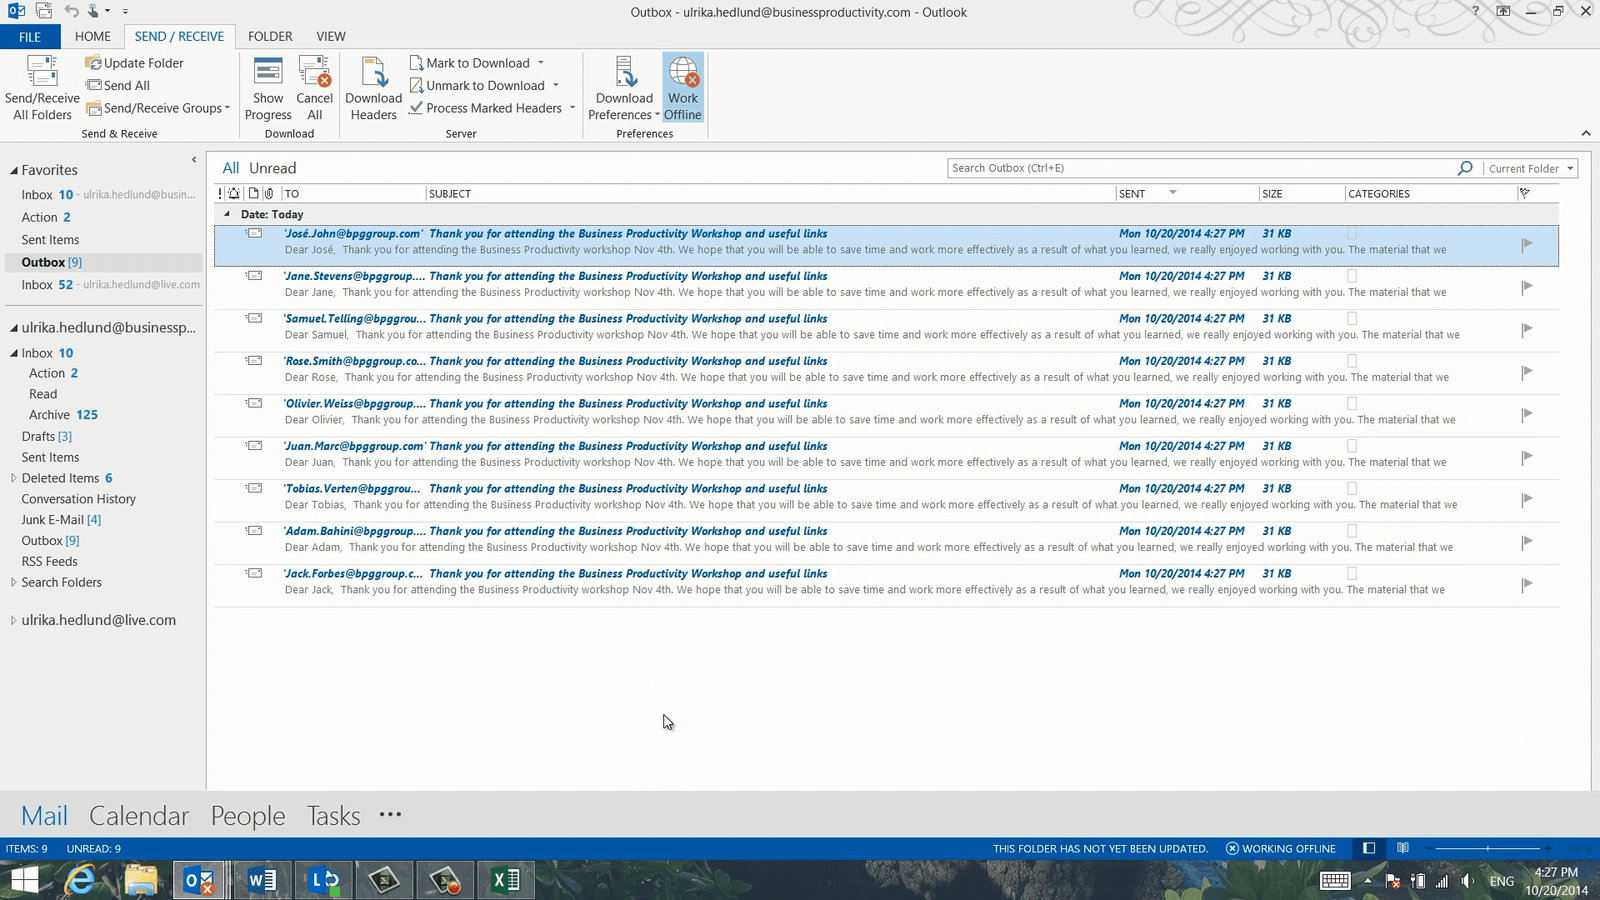
To preview the results click “Preview Results” on the “MAILINGS” tab. You can step through the recipients one by one, or go to the very end to make sure you have them all. Before the email messages are sent, I want to have the ability to review them in my Outbox, so I’ll disconnect Outlook by opening up Outlook and under the “SEND/RECEIVE” tab I’ll click “Work Offline”.

How to finish Mail Merge?
I’ll go back to my Word document and click “Finish & Merge” and select “Send Email Messages”. Here I’ll enter the “Subject line” “Thank you for attending the workshop and useful links”. I’ll keep the mail format as HTML and I’ll keep the default option which is to send it out to all selected recipients and then I’ll click “OK”.

As you can see, Word loops through all recipients, and if I now go to Outlook and open up my Outbox you can see that the nine personalized email messages are there.
Filtering recipient list
Now I want to compose the email to those participants who have provided us with feedback. To change the selection of recipients, click “Edit Recipient list”, click “Filter” and then change the criteria for your selection. Here I’ll change the “Comparison” field to “Not equal to” and click “OK”.

Now I can see that the remaining 5 participants have been selected from the Excel spreadsheet. I’ll click “OK”, and then I’ll open up the second draft email and copy the line thanking the participant for their feedback. Then I’ll paste it into the email message.
In addition to thanking them for their input, I also want to address specific feedback provided by each participant. You can enable Mail Merge to prompt you for individual text for each email message. Place your marker where you want the individual text to be added, click “Rules” and then “Fill-in”. In the prompt field, I’ll write “Address individual feedback”. I don’t want to have any default fill in text since each feedback will be unique. I’ll leave the checkbox “Ask once” unmarked because I want to be asked for each individual email and then I’ll click “OK”.

The prompt opens up and I’m asked to address individual feedback, in this case, it is for Abdullah. I’ll open up the Excel spreadsheet to see what his comments where. His feedback was that it was too hot, so I’ll go back to the text prompt and address his feedback and then click “OK”, and as you can see the text is added to the email message addressed to Abdullah.

Modifying the underlying Mail Merge code
Unfortunately, there is a problem here, when you finish the Mail Merge, you won’t know what recipient Word is prompting for input. Let me show you. I’ll click “Finish & Merge”, and “Send Email Messages”. I’ll keep the same subject line as before and select all recipients, I’ll click “OK” and then I’m prompted to address the first individual feedback which is for Abdullah so I’ll just leave the initial text and click “OK”. I’ve been prompted again, but now I don’t know who for.

To solve this issue I’ll show you a little workaround. I’ll click “Cancel” here and go back to my document. To see the underlying code that Word uses for the Mail Merge press “Alt + F9” on your keyboard. Here you can see what goes on behind the scenes. At the very end, you can see the field to “Address individual feedback”.
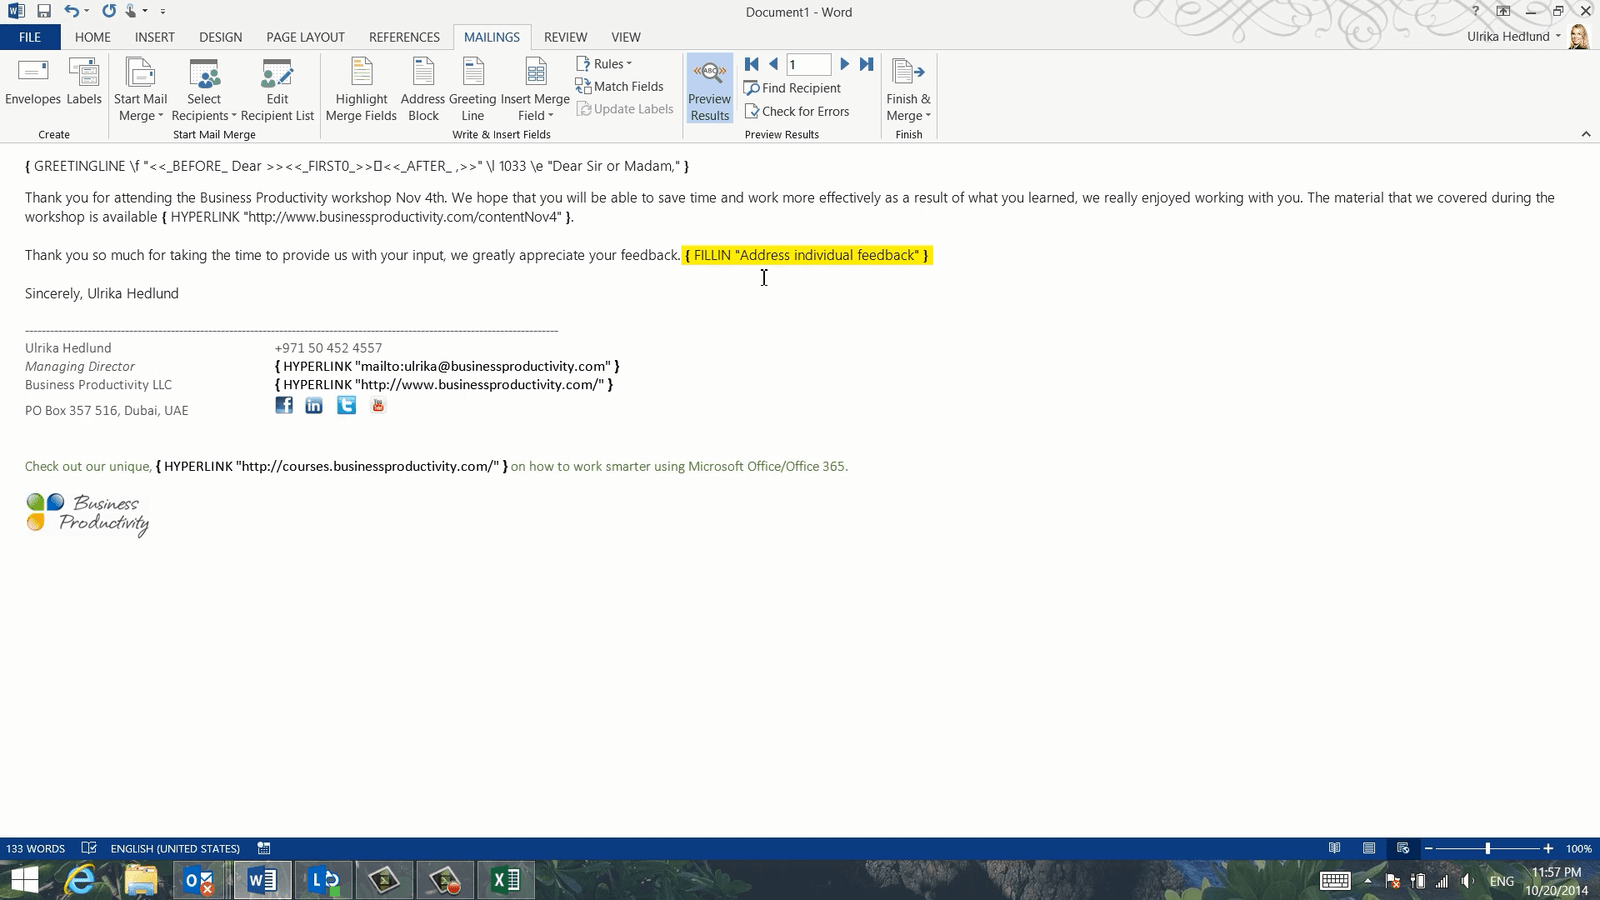
Here I want to add the recipient’s first and last name to the text box where I’m prompted to address the individual feedback. I’ll click right after the text “Address individual feedback” add a space and then write “for”, add another space and then I’ll insert the name by clicking “Insert Merge Field” and selecting the “FirstName”, I’ll press space again, click “Insert Merge Field” and then select “LastName.” The name will not be inserted into the email message, it will only be shown in the message window prompting me for input.

I’ll press Alt + F9 again to hide the code.
Now I’ll try it again, I’ll click “Finish & Merge” and select “Send Email Messages”. I’ll keep the subject line and select all records and click “OK”. Now I’m prompted to address the feedback for Abdullah Khory, which I’ve already entered so I’ll just click “OK”. Next, I’m prompted to address the feedback of Nicole Berg, I’ll go back to the Excel spreadsheet to see her feedback. She just wrote that she learned a lot, I’ll go back to Word and personalize the text to her saying that we’re happy she learned a lot. The next email is to Ahmed, Ahmed and Chen didn’t provide any comments so I’ll just delete the text and leave it empty for both of them. Finally, we have Sven who asked us for the slides. Here I’ll reply that the slides are available on the link provided in the email.

I’ll click “OK” and then I’ll go to Outlook and look in my Outbox to see all email.
How to review your emails before they are sent?
I’ll open up the email message to Sven just to make sure that the individual text has been added, and here I can see that it has. I’ll click “Send” and then when I’ve reviewed all of the email messages I’ll just click “Work Offline” to put Outlook back online to send the email.
Using Mail Merge you’ll save a lot of time when personalizing email messages.
Leave a Reply